What Is Rope Access Waterproofing & Sealant Work?
Water is the single most destructive force acting on buildings. It rots timber, corrodes steel, degrades insulation, stains finishes, promotes mould growth, and — if left unchecked — causes structural damage that costs orders of magnitude more to fix than the waterproofing failure that let it in. The external envelope of a building relies on sealants, membranes, flashings, and drainage details to keep water out, and every one of these components has a finite lifespan.
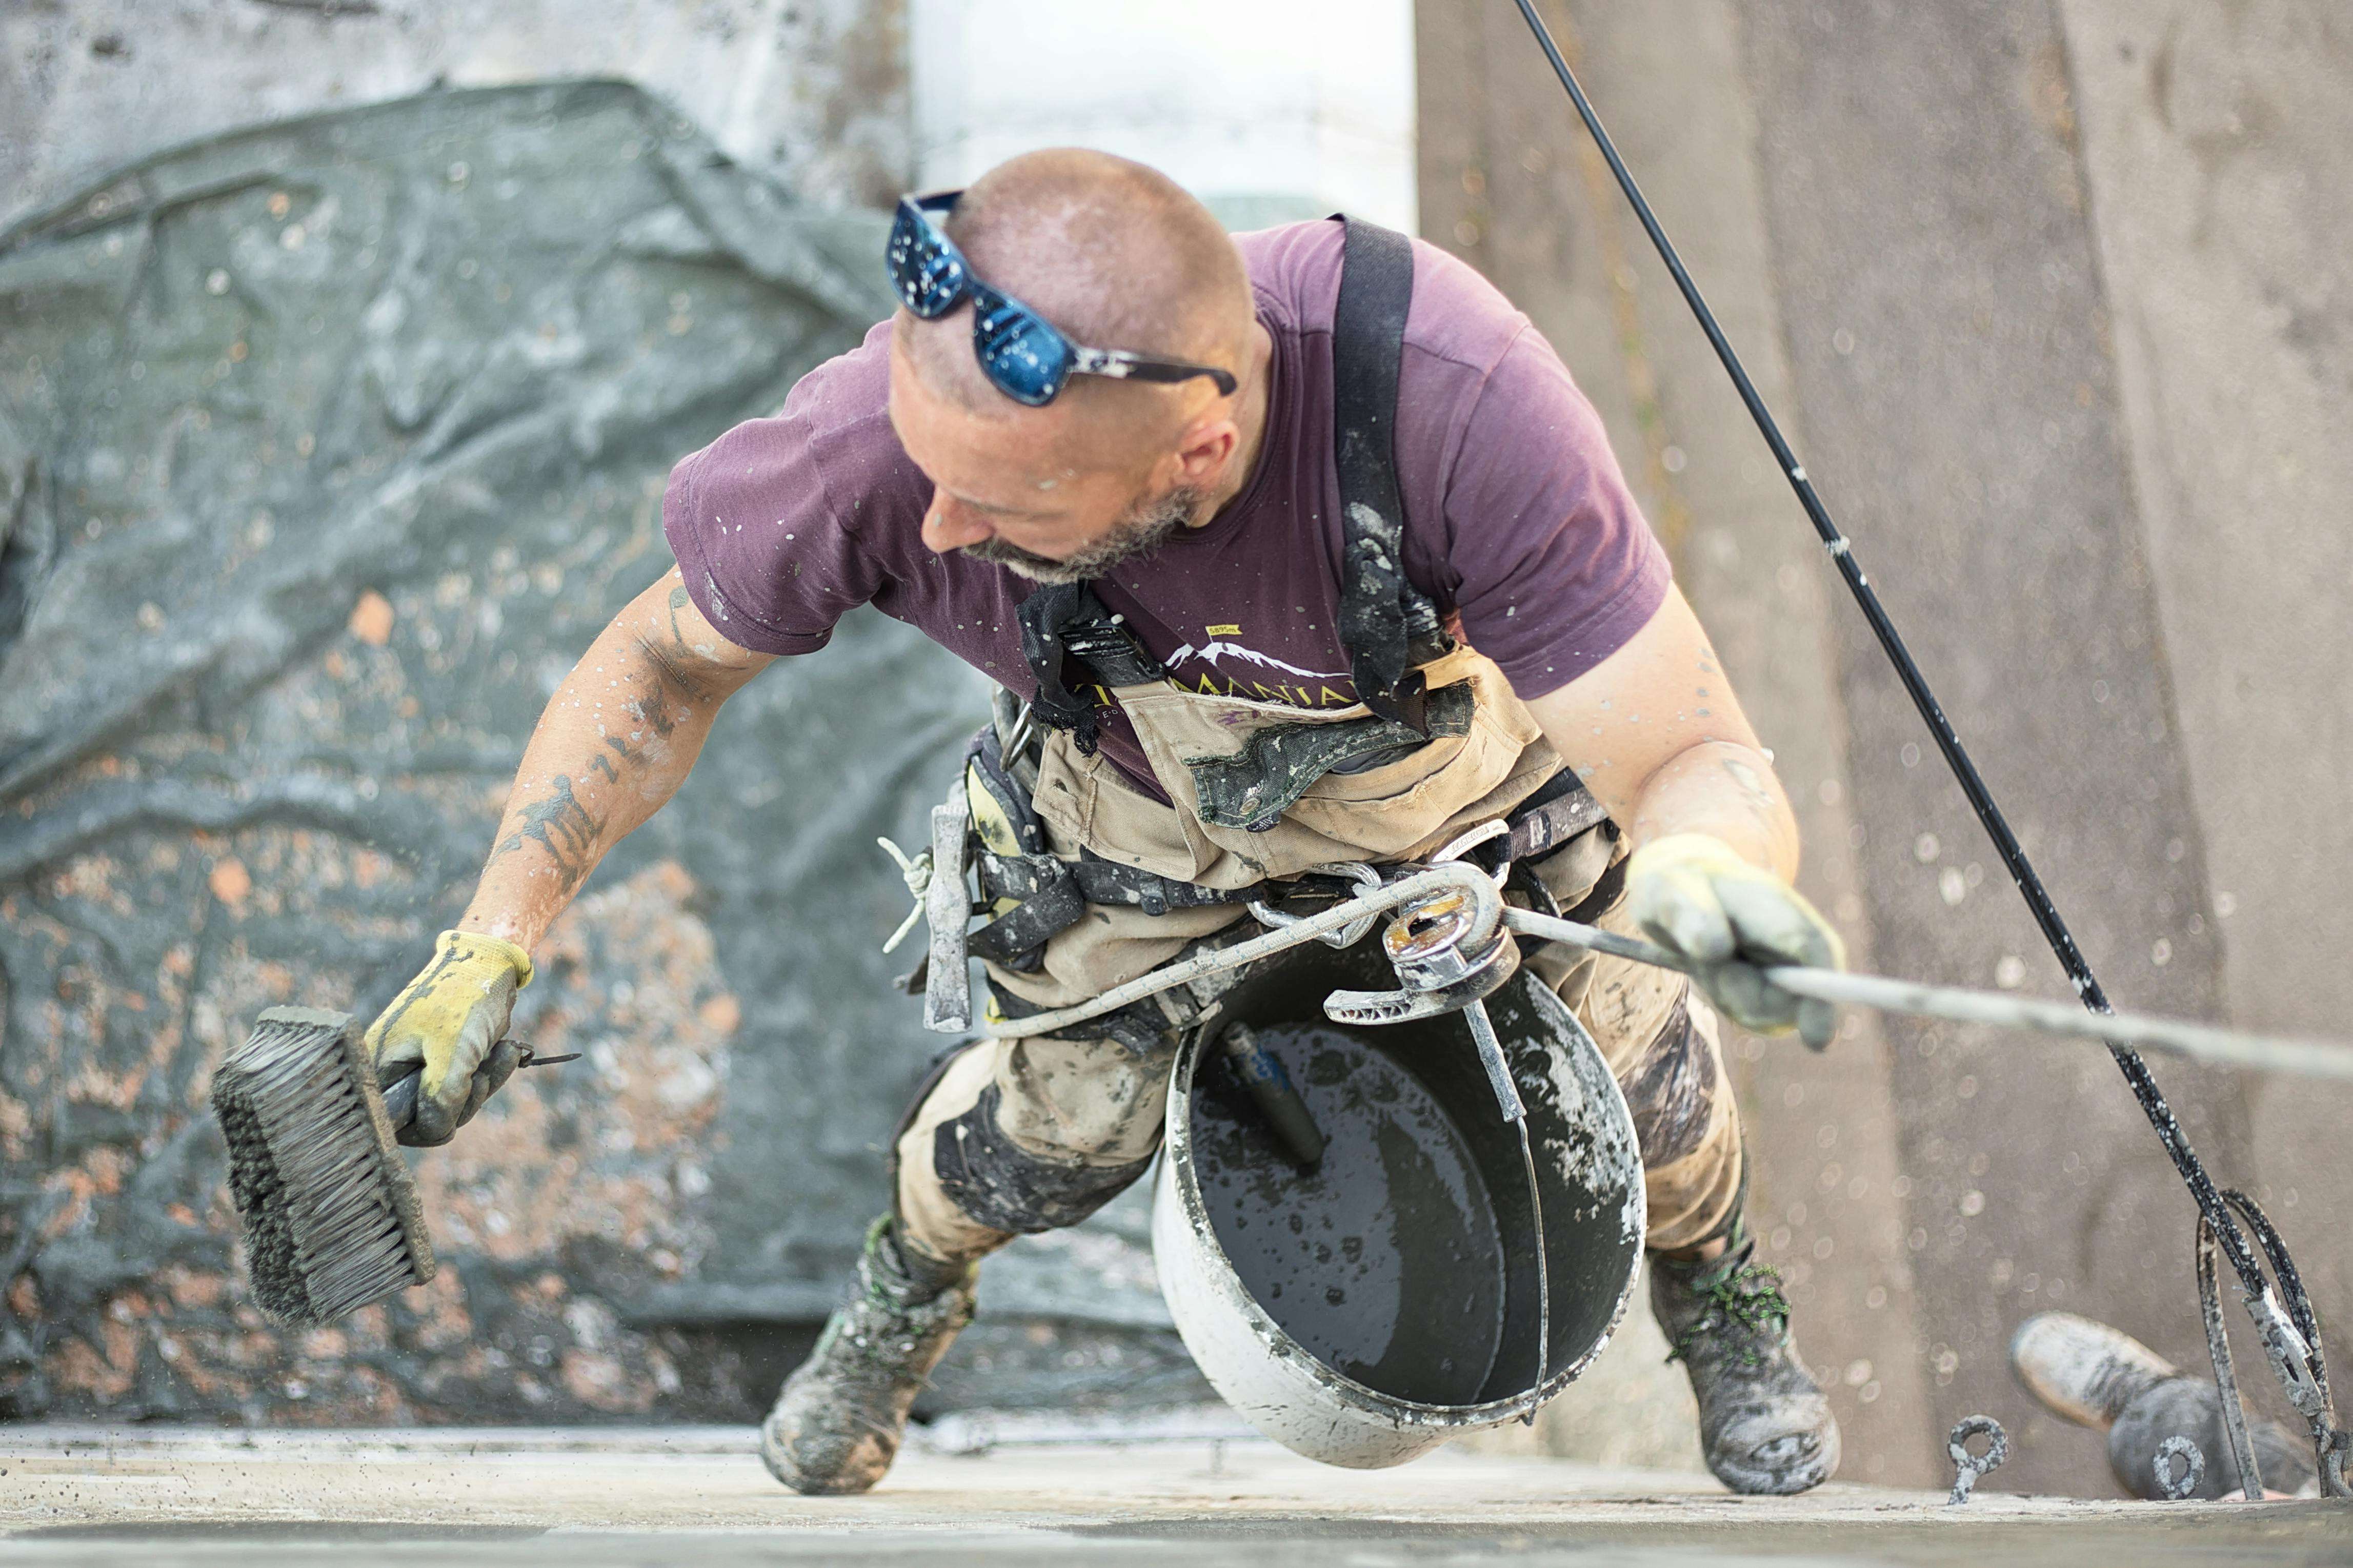
Mastic sealant — the flexible material that fills joints around windows, between cladding panels, at movement joints, and around service penetrations — is the most common point of failure. A typical building sealant has a service life of 15–25 years, and when it fails, water gets in. On a multi-storey building, replacing failed sealant by scaffold is disproportionately expensive relative to the work itself. Rope access is the obvious solution: a technician drops down the facade, rakes out the old sealant, primes the joint faces, and applies new sealant. The cost is a fraction of the scaffold alternative.
Beyond sealant replacement, rope access waterproofing work covers expansion joint repair, liquid-applied membrane systems, leak investigation, curtain wall re-sealing, and balcony and terrace waterproofing. Anywhere water is getting into a building at height, a rope access team can find the entry point and fix it.
Why Sealants Fail
Understanding the failure mechanisms helps you plan a sensible maintenance approach rather than just reacting when water appears inside the building.
UV Degradation
Sunlight breaks down the polymer chains in sealant, causing it to harden, crack, and lose flexibility. South and west-facing elevations degrade fastest. UV degradation is the primary ageing mechanism for exposed sealants and explains why sealant on the sunny side of a building often fails years before the shaded side.
Loss of Adhesion
Sealant works by bonding to the joint faces on either side. If the bond breaks — because the surface wasn’t primed properly during installation, because the substrate was damp, or because the sealant chemistry isn’t compatible with the substrate — the sealant pulls away from the joint face and water gets behind it. Adhesion failure can happen within months of installation if the original workmanship was poor.
Cohesion Failure
The sealant itself splits down the middle. This happens when joint movement exceeds the sealant’s movement capacity — either because the wrong sealant was specified (too stiff for the joint), the joint is wider than designed, or the sealant has lost flexibility with age. Cohesion failure is common in older buildings where the original sealant was low-movement polysulphide that’s now 30+ years old.
Joint Design Problems
Some sealant joints are doomed from the start. The width-to-depth ratio is wrong (sealant works best in joints that are wider than they are deep), there’s no backing rod to control the sealant profile, the sealant is bonded on three sides instead of two (preventing it from stretching freely), or the joint is too narrow for the expected thermal movement. These design issues can’t be fixed by just replacing the sealant with the same detail — the joint needs to be redesigned.
Mechanical Damage
Window cleaners’ equipment, building maintenance, abseiling technicians (ironically), birds, and general building use can physically damage sealant joints. The damage may be invisible from ground level but allows water in at specific points.
Sealant Types: Choosing the Right One
Not all sealants are created equal, and using the wrong type for the joint application is a recipe for premature failure.
Silicone
The workhorse of building sealants. Excellent UV resistance, good flexibility (movement capacity typically ±25%), wide temperature range, and very long service life (25–40 years for premium grades). Silicone sealant doesn’t shrink, doesn’t go hard, and bonds well to glass, aluminium, and most smooth substrates. The main limitation is that it can’t be painted — so it’s used in joints where the sealant is either hidden or where its natural colour (typically grey, black, or white) is acceptable. Silicone is the standard sealant for curtain wall and glazing applications.
Polyurethane
More versatile than silicone in some respects — it can be painted, bonds well to concrete and masonry, and offers good movement capacity (±20–25%). Polyurethane sealants are commonly used for joints in rendered facades, around window frames in masonry walls, and for general construction joints. They have a shorter service life than silicone (15–20 years typically) and are less UV-resistant, which is why they’re often painted over.
Polysulphide
Once the standard building sealant in the UK, polysulphide is now less commonly specified for new work. It offers good movement capacity and adhesion to a wide range of substrates, but it has a shorter service life than modern silicone or polyurethane products (10–20 years) and can stain porous substrates like natural stone. You’ll still find polysulphide in many buildings constructed or refurbished before 2000.
Hybrid Sealants (MS Polymer)
Modified silicone polymer (MS polymer) sealants combine advantages of silicone and polyurethane — they’re paintable, UV-resistant, bond to most substrates, and offer good movement capacity. They’ve become increasingly popular for general building applications and are a good all-round choice where the joint application doesn’t demand a specific sealant chemistry.
Intumescent Sealants
Fire-rated sealants that expand when exposed to heat, sealing gaps against fire and smoke spread. Used around fire-rated doors, service penetrations, and at fire compartment boundaries. These are specialist products that must be installed to the manufacturer’s tested details to maintain the fire rating.
Common Waterproofing Applications
Curtain Wall Re-Sealing
Curtain wall systems rely on gaskets, weather seals, and structural silicone to keep water out. Over time, gaskets compress and perish, weather seals crack, and silicone joints degrade. Re-sealing a curtain wall by rope access involves:
- Removing failed gaskets and sealant
- Cleaning and priming joint faces
- Installing new gaskets or applying new sealant to manufacturer’s specification
- Testing completed joints with controlled water spray
A two-person rope access team can typically re-seal 15–25 linear metres of curtain wall joints per day, depending on joint complexity and access. That’s enough to re-seal an entire elevation of a medium-sized office block in three to five days.
Window Perimeter Sealant
The joint between a window frame and the surrounding wall is a critical weathering detail. When this sealant fails, water tracks behind the frame and into the wall construction — often causing damage that’s hidden until it becomes severe. Rope access window sealant replacement follows the same process: rake out old sealant, clean, prime, apply new sealant with correct joint geometry and backing rod.
Expansion Joint Repair
Movement joints in concrete and masonry structures accommodate thermal expansion, structural movement, and settlement. The sealant or cover system in these joints fails over time and needs replacing. Expansion joints on facades, parapets, and balconies are straightforward to access by rope. The repair involves removing the old sealant, checking the joint condition, replacing the backing rod if needed, and applying new sealant with the correct width-to-depth ratio.
Liquid-Applied Waterproofing Membranes
For horizontal and low-slope surfaces at height — balconies, terraces, parapets, and flat roof edges — liquid-applied membranes provide seamless waterproofing that follows complex geometry without the joints that sheet membranes require. Products like Sikalastic, Kemper, and Triflex are applied by brush, roller, or spray in two or three coats over a primed surface, reinforced with a fleece layer between coats.
Rope access technicians can apply liquid membranes to balcony surfaces, parapet copings, and terrace edges. The main constraint is weather — the substrate must be dry and temperatures above 5°C during application and curing.
Leak Investigation: Finding Where Water Gets In
This is often the most valuable service a rope access waterproofing team provides. A leak in a multi-storey building can be maddeningly difficult to trace because water rarely enters and appears at the same location. It can travel horizontally along flashings, vertically down cavities, and diagonally along structural members before finally showing up as a damp patch floors below and metres away from the actual entry point.
The Diagnostic Process
Step 1 — Internal assessment. Examine the area where the leak is manifesting. Note the location, pattern of staining, timing (does it appear during rain, after rain, or during specific wind conditions?), and any visible paths the water might be following internally.
Step 2 — External visual inspection by rope access. A technician examines the facade above and around the internal leak location, looking for obvious failures: cracked sealant, missing pointing, displaced flashings, blocked drainage channels, cracked render, failed DPCs.
Step 3 — Controlled water testing. If the visual inspection doesn’t reveal an obvious cause, systematic water testing isolates the entry point. Starting at the lowest suspect point and working upward, the technician floods specific joints, details, or areas with water from a hose while someone monitors internally. Each test area is isolated so that when water appears inside, you know exactly which detail let it through.
Step 4 — Report and repair. The entry point is documented, the cause identified, and a repair specification produced. In many cases, the repair can be carried out immediately by the same rope access team — sealant replacement, flashing repair, or whatever is needed.
Cost of Leak Investigation
| Activity | Typical cost |
|---|---|
| Rope access leak investigation (half day) | £500–£800 |
| Rope access leak investigation (full day) | £800–£1,400 |
| Simple repair (sealant, flashing) — same visit | £200–£600 additional |
| Comprehensive water test survey (multiple locations) | £1,500–£3,000 |
Compare this to the cost of leaving a leak unresolved: internal damage to finishes, mould growth, structural deterioration, and disruption to occupants. A single day’s investigation is usually the most cost-effective money you’ll spend on the building that year.
The Cost of Leaving Water Ingress Untreated
Water ingress that’s ignored doesn’t stay the same — it gets worse, and the secondary damage it causes can be devastating:
- Mould growth begins within 24–48 hours of sustained dampness, creating health hazards and triggering complaints from occupants
- Timber decay — window frames, lintels, and structural timber in older buildings rot when persistently damp
- Insulation degradation — wet insulation loses its thermal performance and may not recover even when dried out
- Steel corrosion — water reaching structural steelwork or reinforcement accelerates corrosion, leading to expensive structural repairs
- Finish damage — stained plasterwork, peeling paint, damaged floor coverings — all of which cost money to make good
- Electrical hazards — water reaching electrical installations creates genuine safety risks
A sealant renewal programme that costs £5,000–£15,000 every 15–20 years is vastly cheaper than the internal damage repairs that result from deferred maintenance. This is one of those areas where planned expenditure pays for itself many times over.
Planned Sealant Replacement Programmes
Rather than waiting for leaks to appear, the smart approach is to replace sealants on a planned cycle based on the expected service life of the sealant type and the building’s exposure conditions.
Typical Replacement Cycles
| Sealant type | Expected service life | Recommended inspection interval |
|---|---|---|
| Premium silicone | 25–40 years | Every 10 years |
| Standard silicone | 20–30 years | Every 8 years |
| Polyurethane | 15–20 years | Every 5–7 years |
| Polysulphide | 10–20 years | Every 5 years |
| MS polymer | 15–25 years | Every 7 years |
| Acrylic | 5–10 years | Every 3 years |
These are general guidelines. South-facing joints in exposed locations will degrade faster. Joints that are poorly designed (wrong width-to-depth ratio, three-sided adhesion, no backing rod) will fail sooner regardless of sealant quality.
A planned programme typically works like this:
- Baseline survey — rope access close visual inspection of all sealant joints, grading condition from 1 (good) to 5 (failed)
- Priority repairs — immediate replacement of any joints rated 4 or 5
- Phased renewal — planned replacement of remaining joints grouped by elevation or sealant type, spread across two to three financial years if budget requires
- Periodic re-inspection — rope access check every five years to monitor condition and catch any early failures
Costs Per Linear Metre
Sealant replacement pricing is typically quoted per linear metre, with the rate depending on joint size, sealant type, and access complexity.
| Joint type | Sealant replacement cost (per linear metre) |
|---|---|
| Window perimeter joint (10–15 mm width) | £8–£15 |
| Cladding panel joint (15–25 mm width) | £12–£20 |
| Expansion joint (20–40 mm width) | £15–£30 |
| Curtain wall structural silicone | £20–£40 |
| Liquid membrane to balcony or parapet (per m²) | £30–£60 |
These rates include rope access, old sealant removal, surface preparation, priming, backing rod, and new sealant application. Minimum charges apply for small quantities — most contractors have a minimum mobilisation charge of £500–£800 that covers the cost of rigging and equipment transport regardless of the volume of work.
Worked Example
A 14-storey office building with curtain walling, needing full perimeter sealant replacement to 120 windows and all horizontal and vertical panel joints on two elevations. Approximately 2,400 linear metres of sealant joints.
| Approach | Access cost | Sealant works | Total | Programme |
|---|---|---|---|---|
| Full scaffold (two elevations) | £45,000–£70,000 | £30,000–£45,000 | £75,000–£115,000 | 10–14 weeks |
| Rope access | Included | £35,000–£55,000 | £35,000–£55,000 | 4–6 weeks |
Health and Safety
Specific Considerations for Waterproofing Work
- Chemical exposure — sealant primers, cleaning solvents, and some sealant formulations contain volatile organic compounds (VOCs) and potential sensitisers. COSHH assessments are required for every product used, and technicians should use appropriate PPE including gloves and, in poorly ventilated conditions, respiratory protection.
- Hot-applied materials — some membrane systems involve hot-applied bitumen or torch-on products. These present burn and fire risks that need specific risk assessment and control measures. Rope access technicians must secure hot-work equipment to prevent drops.
- Occupied buildings — sealant solvents and primers can produce noticeable odours. On occupied buildings, particularly residential, advance warning to occupants is important, and work near open windows should be timed to minimise impact.
- Working near glazing — sealant work often involves working directly adjacent to occupied windows. The team should coordinate with building management to ensure occupants are aware and windows are closed during application.
Standard Documentation
- Site-specific RAMS
- IRATA company membership and valid technician ID cards
- COSHH assessments for all materials
- Product data sheets confirming sealant specification, movement capacity, and compatibility with the substrate
- Sealant manufacturer’s written approval of the proposed joint design (for critical applications)
- Adhesion test results — on critical joints, peel adhesion tests on trial applications before committing to full replacement
Get a Quote
We connect you with specialist rope access waterproofing and sealant contractors across the UK. Whether you need a leak investigation, sealant condition survey, targeted repairs, or a full sealant renewal programme, tell us about the building and the problem and we’ll match you with experienced teams. No obligation — and for straightforward sealant replacement, most contractors can provide an initial estimate from building dimensions and photos without a site visit.